Removing / Installing the Kawasaki ZZR1200 Front Wheel
Removing the front tire is an easy thing on the Zed, and although the service manual is a great guide, there are a few gotchas
These are my steps and the tools that I like to use
Before you start, you should have a way to prop the front fork up and allow
access to the main axle and the nut and pinch bolts.
You can use a Fork stand, a jack under the engine or a pin under the tripple
tree hole if you remove the guard and brake tree that are located there.
Depending on what I am doing, I've used all three techniques.
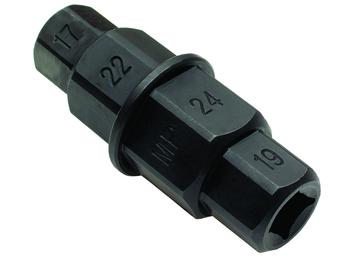
Get yourself TWO of these. They are called a "Hex
Axle Tool".
http://www.motionpro.com/motorcycle/tools/view/t_6_crmo_hex_axle_tool/
You can get around NOT having two of these, but you'll need some pretty big
Hexes in your tool kit, and larger sizes are not usually available in your local
Hardware or Auto store.
I also recommend getting TWO of these. They are called "Breaker Bars"
and Sears
has them.
You are going to use a TON of force to get the front Axle off.
The longer the better, and get 1/2" drive so you get the heftiest one
out there!
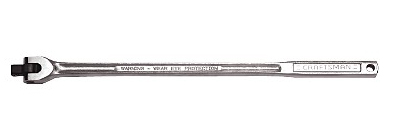
Make sure you get a 1/2" to 3/8" adapter if you are going use a breaker
bar on the Hex Axle Tool directly - but I don't recommend that.
I don't use a breaker bar directly on the Hex Axle Tool, but use a
deep socket over either the 24mm or the 22mm end of the Axle Tool.
In doing so, I don't run the risk of snapping off the drive since you will
use a TON of force to get the axle/nut off.
Aside from the above tools I mentioned, you will need a torque wrench and other
various "hex" wrenches.
The Steps.
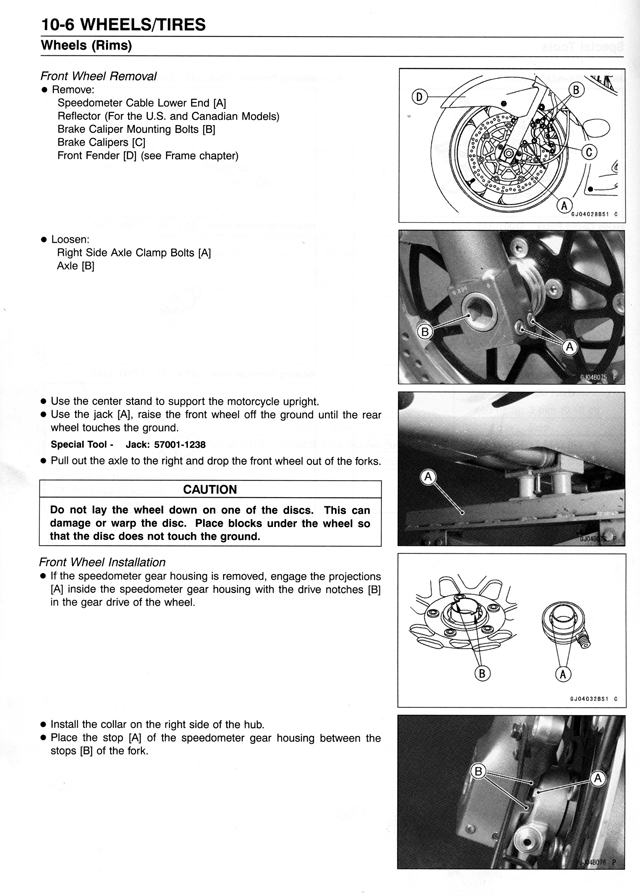
- Take the speedometer cable lower end off [Fig 1- A]. You might need a plier
to take it off since it's not a specific size.
- Take off any reflectors
- Remove the Brake Caliper Bolts [Fig 1 - B]
- Remove the Brake Calipers [Fig 1 - C]. Make sure no one pumps the brakes
when you're doing this!
- Remove the front Fender, and don't forget the plastic hose guides. Pinch
them from inside the fender to get them to release easily.
Fig 1.
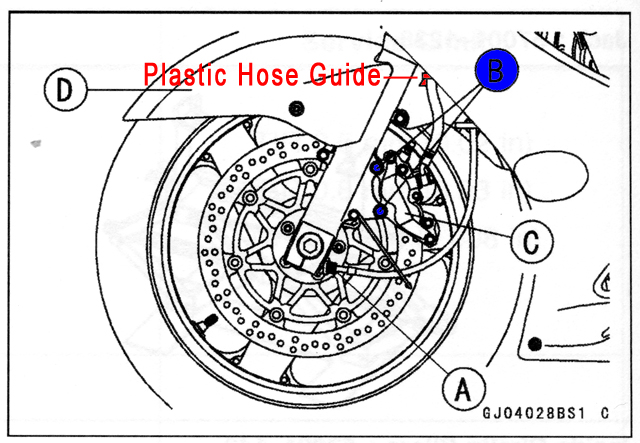
- Release the tension on the 4 Axle clamp/pinch bolts [Fig 2 - A].
Fig 2.
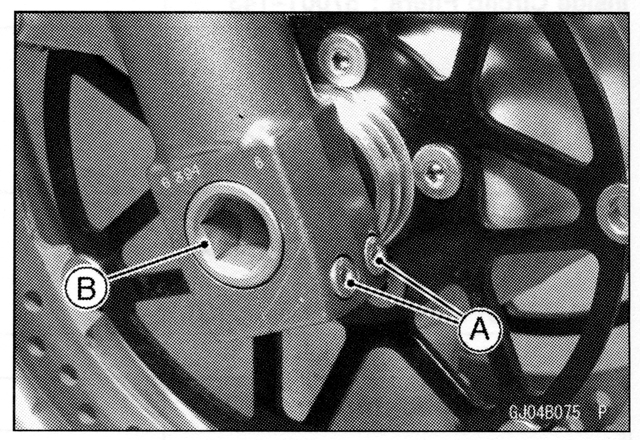
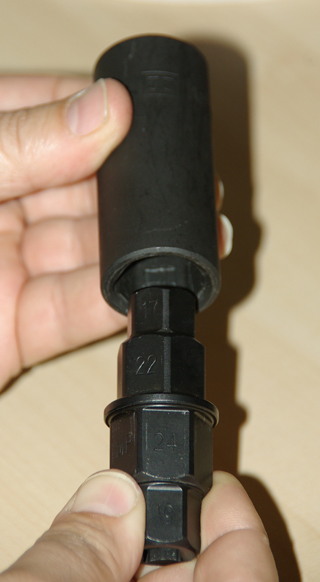
- Insert your axle tools into the axle [Fig 2 - B] with a socket over each
end. You'll need a 22mm and 24mm deep socket if you are using a motion-pro
tool. The ZZR1200 uses a 22mm hex and a 17mm on it's axle.
- Break the axle nut with the bike's weight on the tire without being jacked
up. Since the Torque for the Axle nut is 94ft-lbs, having the bike's weight
will make it easier when you have the two breaker bars working in opposite
directions!
- When the axle nut "cracks", jack up the front of the motorcycle.
In the Kawasaki manual it says to "Raise the front wheel off the ground
until the rear wheel touches the ground". I don't know what the assumption
is here; are you using the center stand or the cool Kawasaki Jack? If you
use the center stand and lift the front of the bike enough to try and touch
the wheel to the ground, you will cause the part of the center stand that
you place your foot on, to touch way before the rear wheel
does! If you continue to "Jack it up" you might bend the lever that
your foot goes on! Looking at the picture in the manual, it looks like the
jack is touching the center-line of the bike under the header collectors,
if you jack the bike up and touch the rear wheel, the bike will be unstable!!!
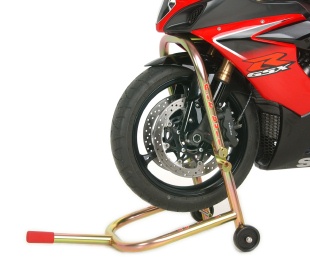
How is the bike balanced in the pictures? My technique is to use the Pit Bull
New
Front Stand, with the ZX10R
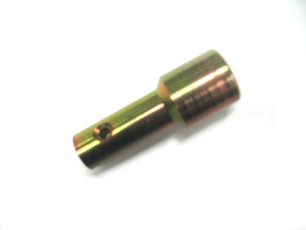
pin.
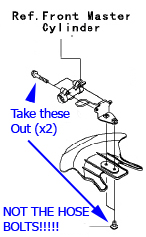
- You will have to remove the plastic cover under the tripple tree and the
mounting bolts for the brake tree (NOT THE HOSES) to use the stand, but it
works perfectly!
- You've got to get the front tire up enough to do the job of getting the
front wheel off. I'll leave it at that!
- Once the front wheel is up, remove the axle from the right and observe how
everything came off.
- Make sure you pay attention to the speedometer housing.
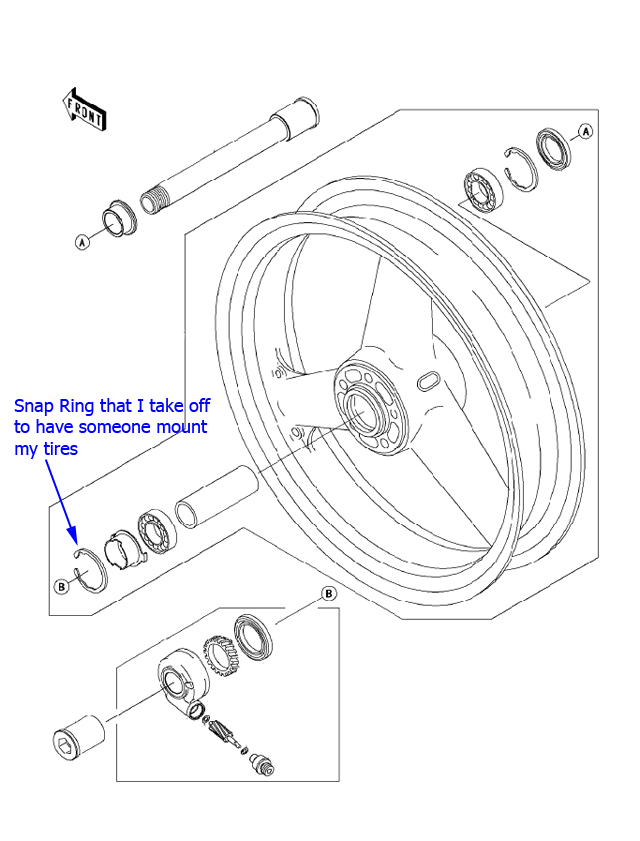
- One of the things I do, is take off the speedometer collar that sits on
the wheel itself. There is a snap ring that holds it against the wheel. I
take this off so that the people that are mounting my tire won't have it around
to bend/ smash.
Installing the wheel
Installing the wheel is the opposite of taking it off, but care must be taken
that the speedometer cable and housing are in their correct location.
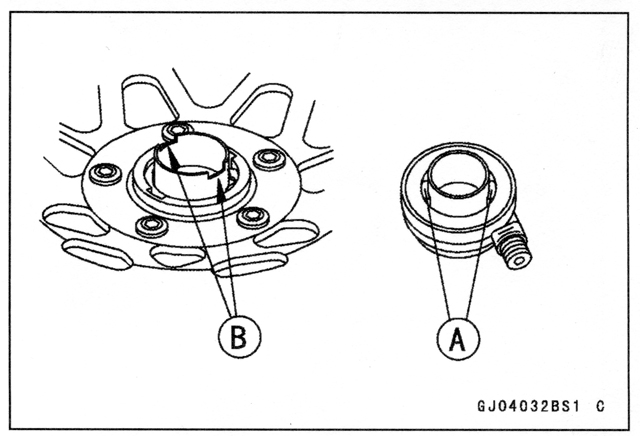
There are some little gotcha-tabs in the housing [Fig.3 - A] that fit in recesses
in the collar on the wheel [Fig.3 - B].
If you don't line these up, you'll have problems.
Fig. 3
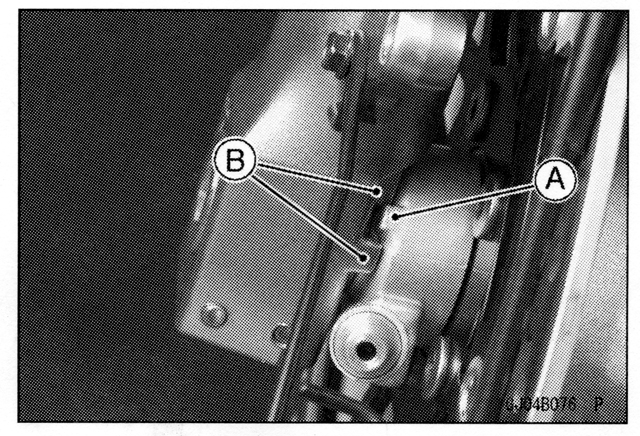
Also, when you put the speedometer housing on, make sure the tab on the housing
[Fig.4 - A] is in the slot on the fork [Fig.4 - B].
Fig. 4
Finally, here is a little table that has the torque specs.
| Fastener |
N-m |
kgf-m |
ft-lb |
Page in Service Manual
Part # 99924-1279-01 |
| Front Axle Nut |
127 |
13.0 |
94 |
10-3 |
| Front Axle Clamp/Pinch Bolts |
20 |
2.0 |
15* |
10-3
*There is a typo in the service manual that states 1.5, which is wrong. |
| Front Caliper Mounting Bolts |
25 |
2.5 |
18 |
12-3 |
The Kawasaki Page from the Manual
Lauren 1/13/2009